Quick Start Guide
Respond for Web
Respond for Web offers a customizable, browser-based view of PulsePoint incident feeds at web.pulsepoint.org.
Move the incident list from the right side to the left side (and back) with a click or tap of the small ear tab visible near the inside middle of the list. Alternatively, you can click or tap the menu icon (vertical ellipsis/three dots) and select Move List to Left (or Right).
Respond for Web
Feed Settings
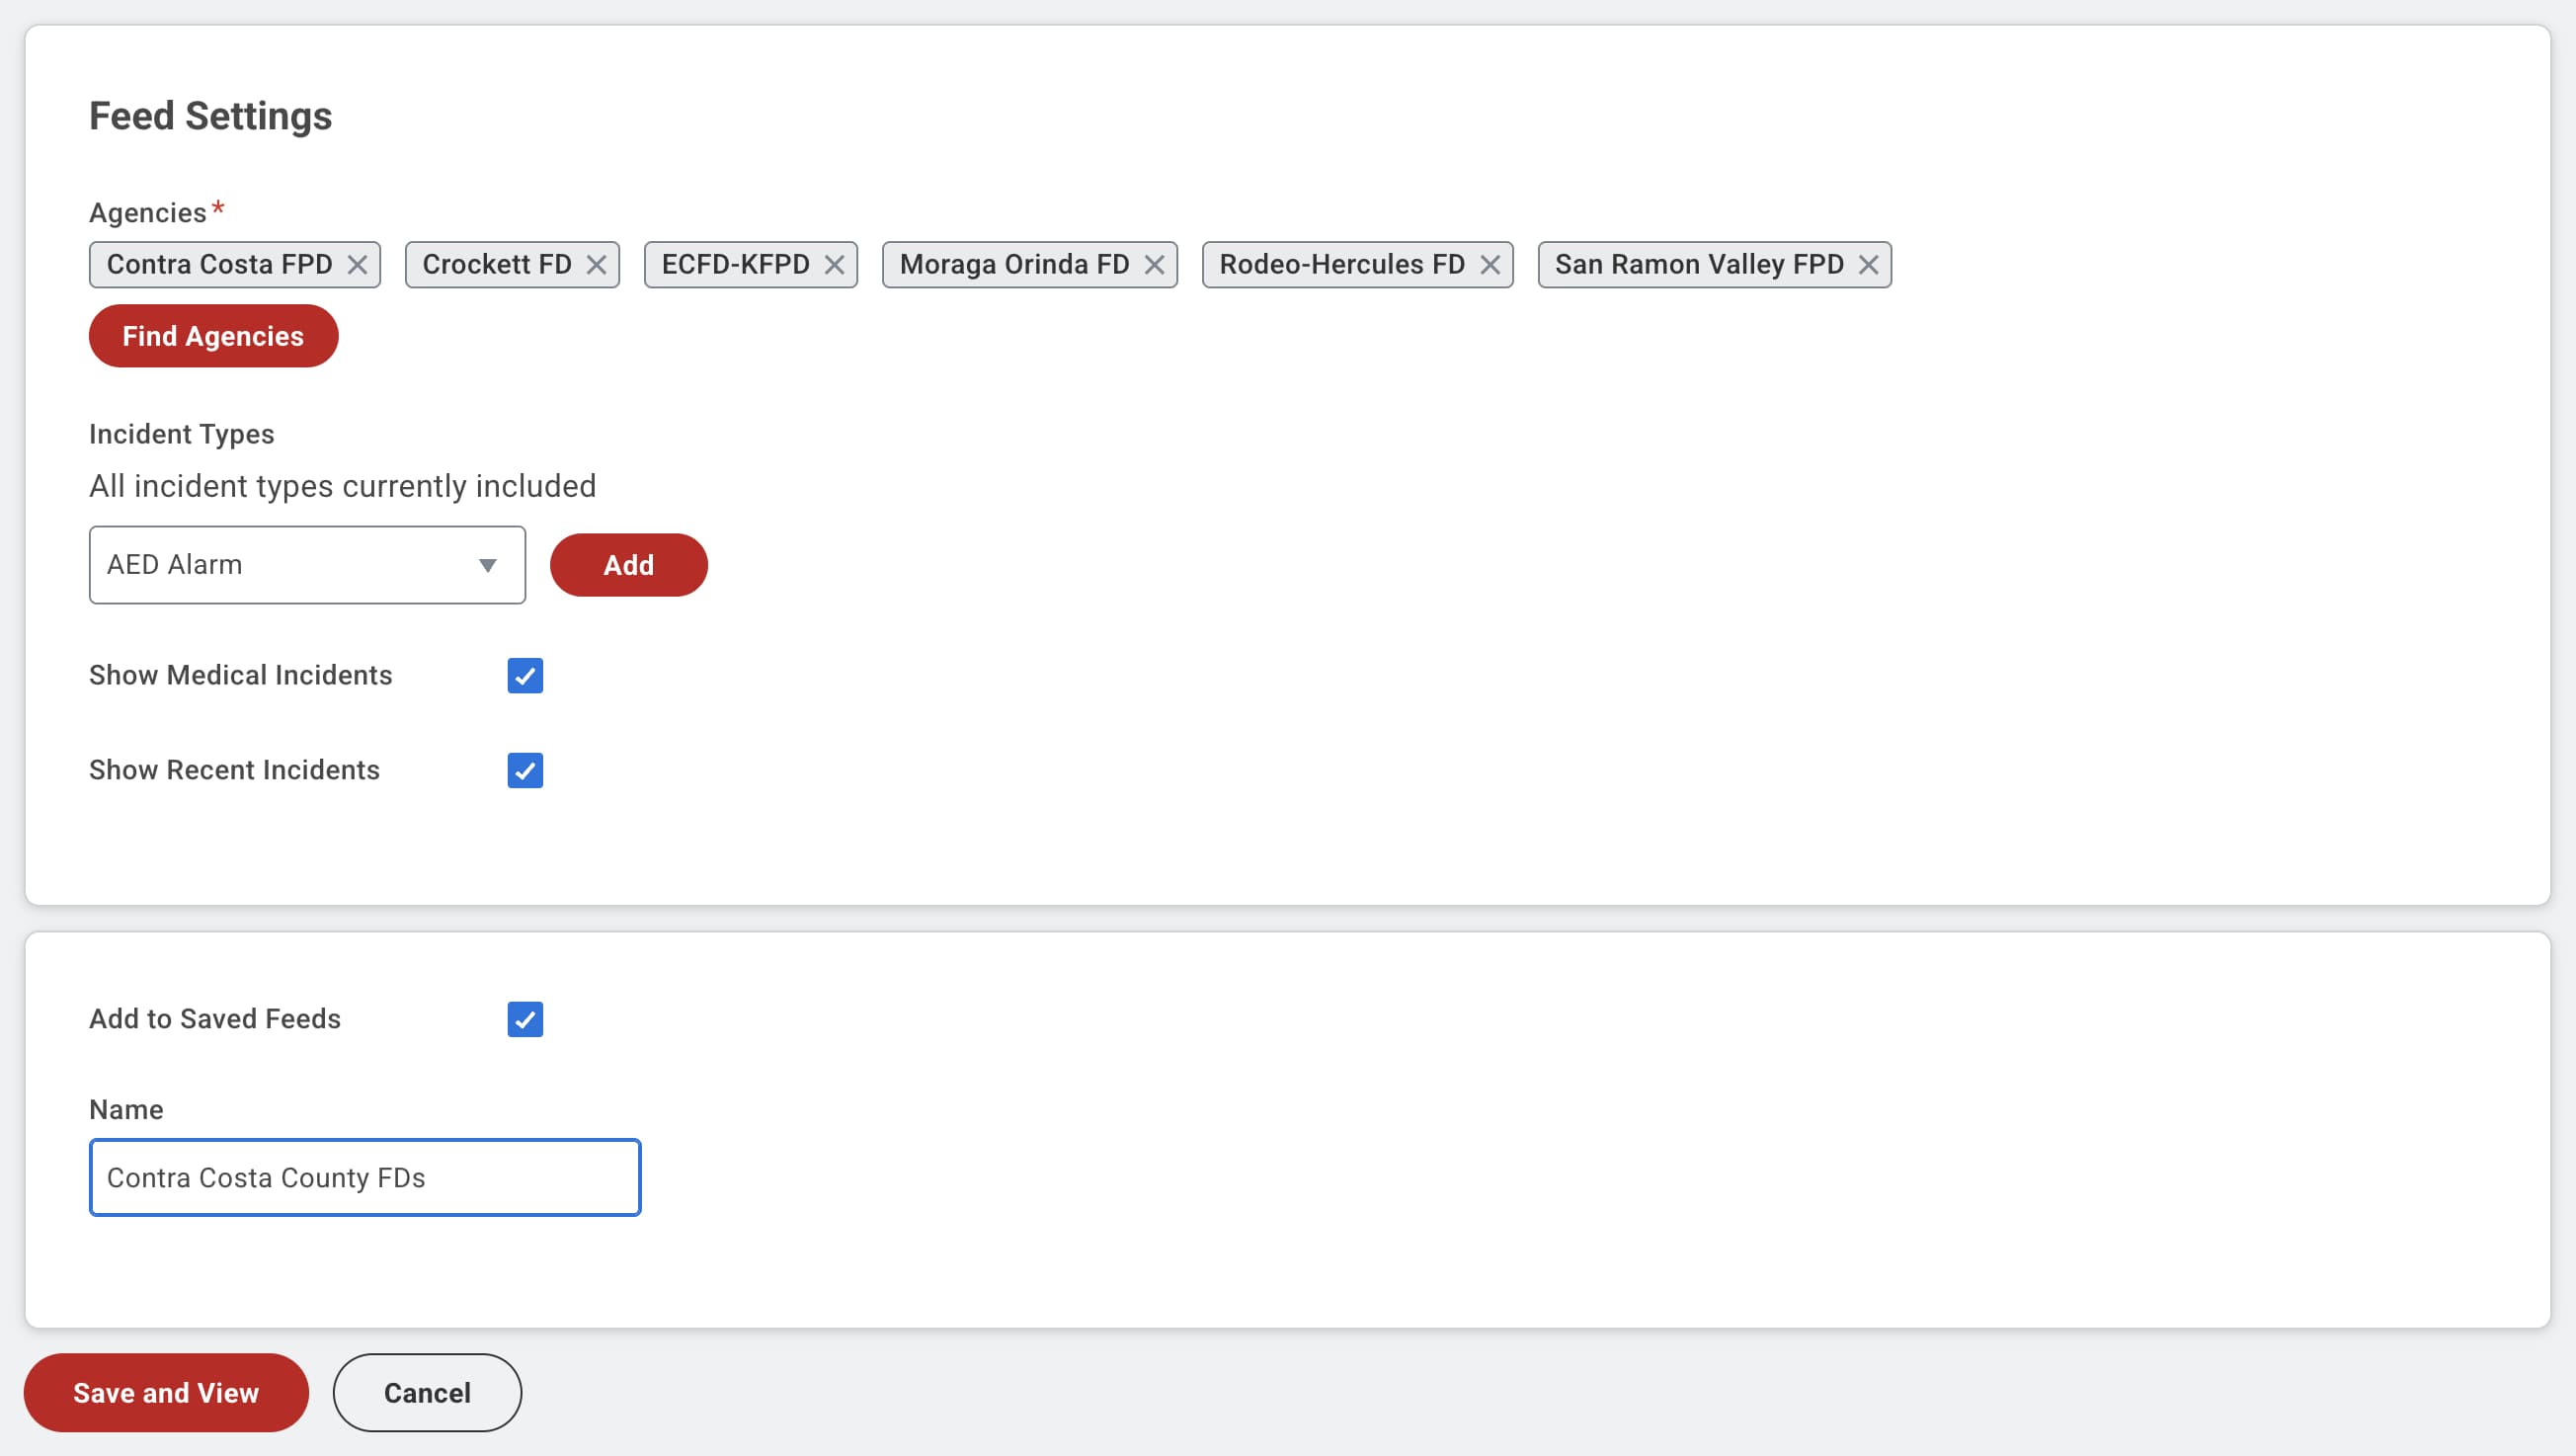
- To access the Feed Settings page, click or tap the edit icon (pencil) next to the feed name. Alternatively, you can click or tap the menu icon (vertical ellipsis/three dots) and select Edit Feed.
- Click the Find Agencies button to search and add agencies to your feed. Remove agencies using the X in their name tag.
- By default, all incident types are included. Optionally, select a subset of incident types using the dropdown list and Add button.
- Uncheck Show Medical Incidents to exclude medical incident types from the feed.
- Uncheck Show Recent Incidents to exclude closed incidents from the feed.
- Enter a name for your feed and click or tap the Save and View button. Although a name is optional you may find it helpful if you create multiple feeds.
Respond for Web
Saved feeds
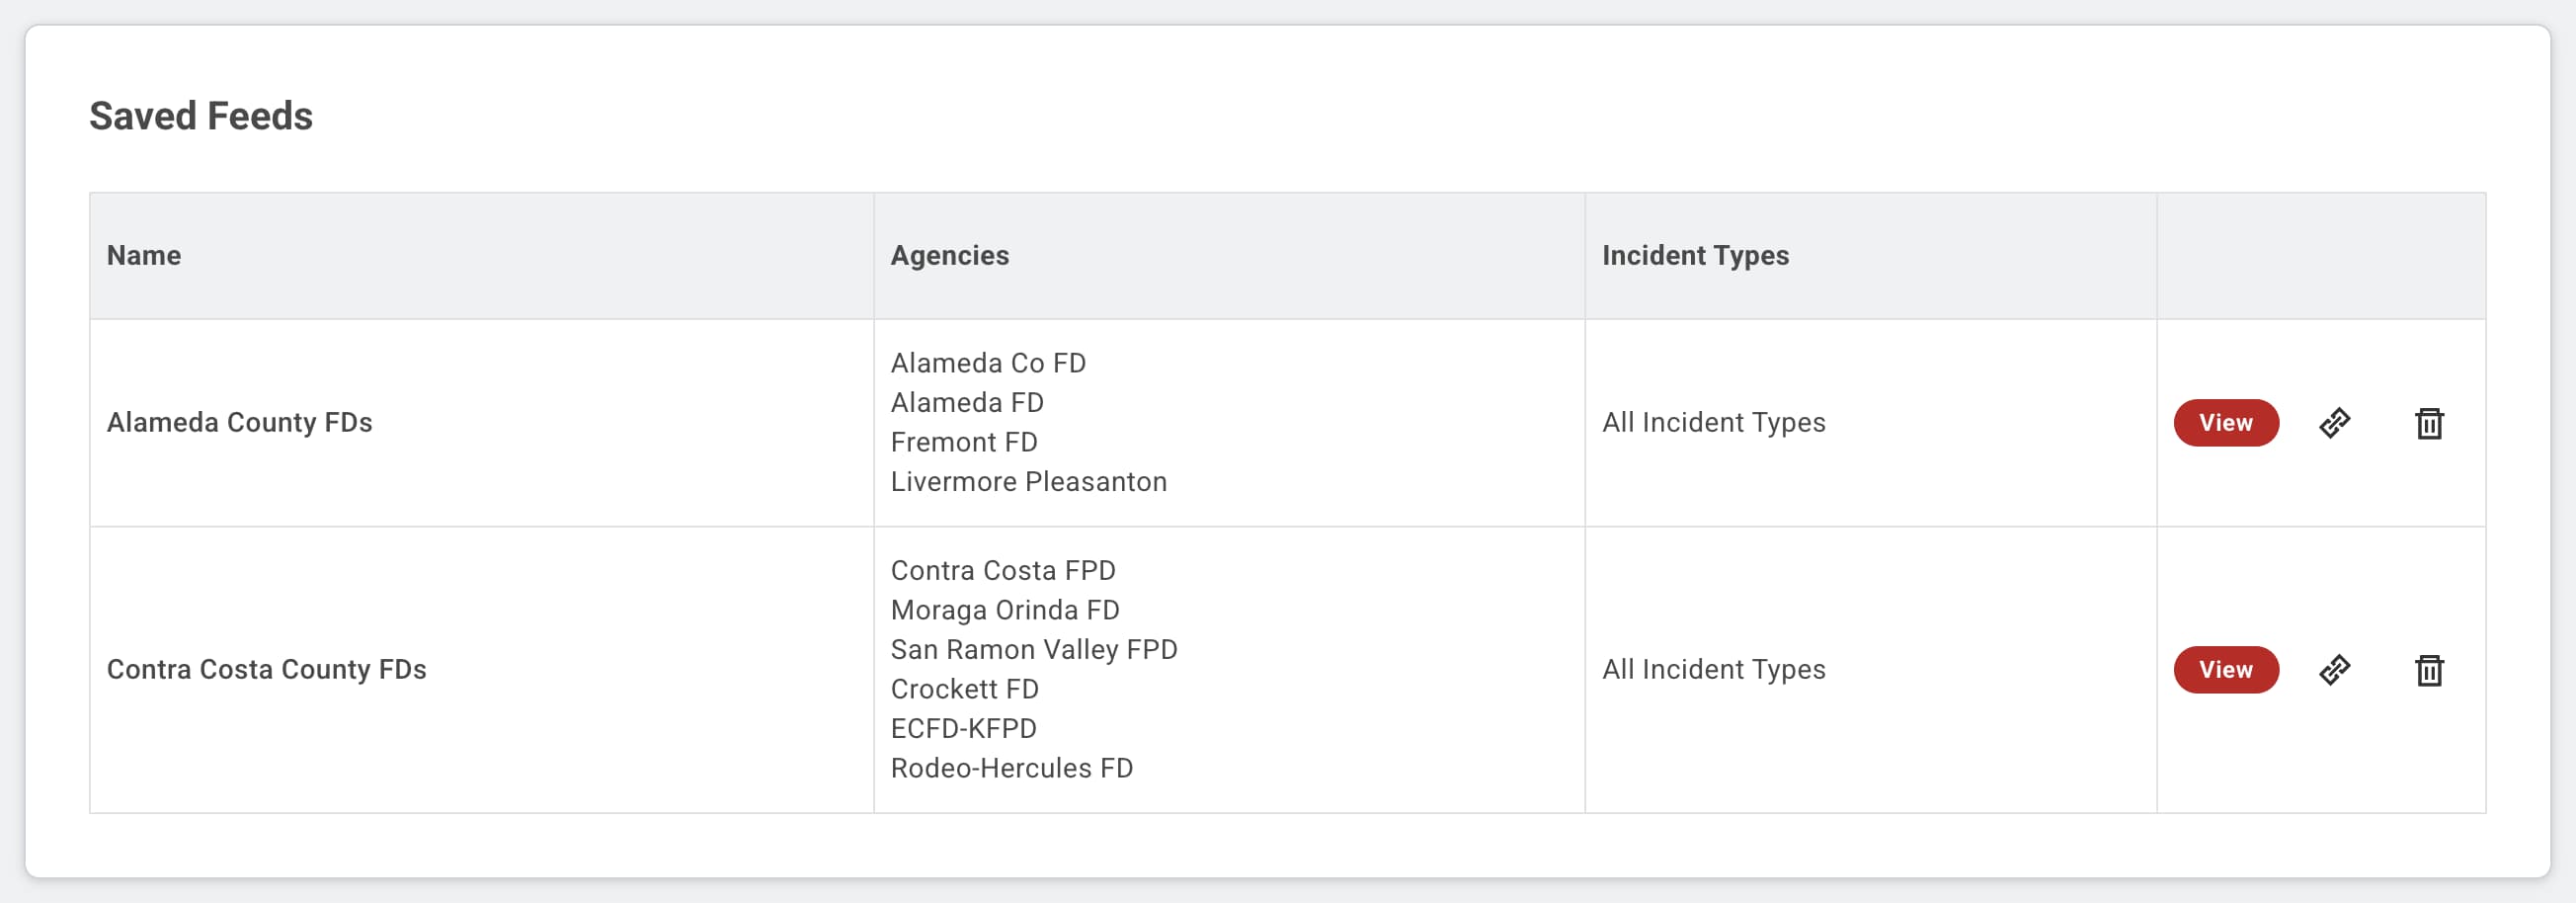
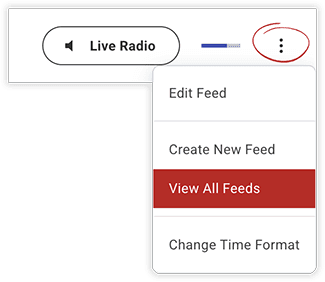
- Access the Saved Feeds page with a click or tap of the menu icon (vertical ellipsis/three dots) and then select View All Feeds.
- Switch between Saved Feeds with a click or tap of the View Button.
- Use the Link icon to copy/share the feed settings.
- Use the Trash icon to remove the feed.
- Use Create New Feed in the menu to add a feed.
Respond for Web
Incident Details
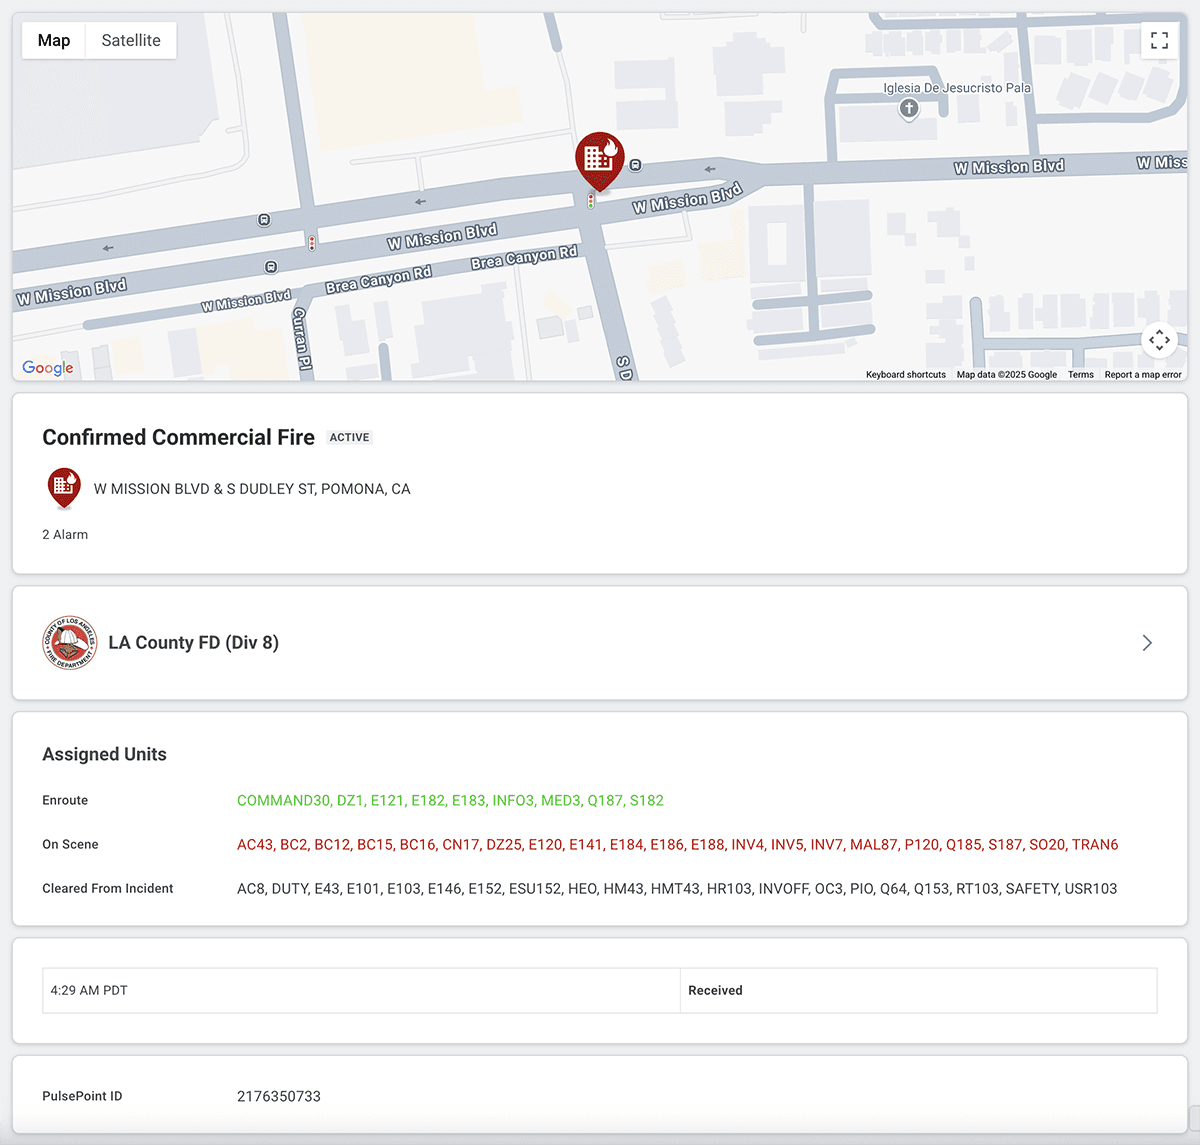

Click or tap on a card in the incident list to access additional details. Alternatively, click or tap on an incident map pin and use the View Details button. Use the browser back button or the PulsePoint header logo to return to the incident list.
- The color-coded identifiers (e.g., BC2, E121) are the call signs/radio IDs of agency units, such as engines, chief officers and ambulances assigned to the incident. The colors indicate their dispatch status such as enroute, onscene, or cleared from the incident. You can learn the colors by referencing the Assigned Units section.
- Click or tap the agency logo/name to view the agency profile. Here you can learn more about the agency, including social media accounts, and in many cases, a unit legend that can help decipher the resource abbreviations.

Respond for Web
Additional tips and resources
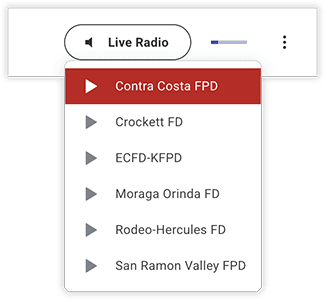
- Use the Live Radio button to stream radio traffic of agencies in your feed. Note that not all agencies offer a radio feed.
- The Respond for Web display will update automatically. The header contains a countdown icon that visually represents the time remaining until the next refresh. You can force a refresh early with a click or tap of this icon. In addition to the incident list, the map will refresh and recenter based on new incidents appearing, however, if you interact with the map (pan, zoom, etc.) the map will not recenter until you click or tap the Reset Map button at the top of the map.
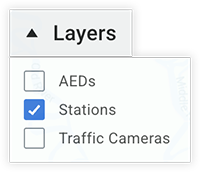
Use the Layers control to select which data layers are visible on the map. You may need to zoom in before some layers become visible.

- AEDs. View Automated External Defibrillator (AED) locations. You can add an AED by visiting aed.new or using the PulsePoint AED app. AED locations are provided by the National Emergency AED Registry (NEAR). If you have access to an AED, you can be notified of a nearby need by subscribing to AED-needed alerts.
- Stations. View fire station locations. View More for additional agency-provided facility details such as address, assigned apparatus, and images.
- Traffic Cameras. Verify traffic conditions and make informed travel decisions. Green video camera icons indicate the location of traffic cameras. View More to display the available media (still image and/or live stream).
- Use the GPS icon to show your location on the map.
- Filter by address or unit using the control above the incident list. If you enter multiple units separated by spaces, the filter will display incidents containing all specified units. If you separate units with commas, the filter will display incidents containing any of the units. Click or tap the GPS icon to display your current location on the map.
- Learn more about the various incident types displayed in PulsePoint Respond.
- For additional functionality including real time incident notifications, download the PulsePoint Respond app for iOS or Android. App users who have indicated they are trained in CPR and willing to assist in case of an emergency can be notified if someone nearby is in cardiac arrest.
- Other questions or feedback? Email us at support@pulsepoint.org.